Legal Cob!
Finally in mid August we got the Certificate of Occupancy! Many lessons were learned and I will be working on sorting through photos and writing up everything I learned about the process in early 2024. If you are exploring the idea of building an inspected cob home I am here to help you, please get in touch! stephenhren (at) gmail (dot) com


Video Walkthrough April 2023
Here is a link to a video at my earthonaut youtube account showing the current status of the project

Pouring the Slab Floor
A long process of grading the interior, adding gravel, insulation board, vapor barrier, and form works came to a head over the last two weeks as we poured the concrete slab floor in two separate sessions one week apart. The first day we poured alternating sections of trapezoids. One week later we poured the remaining trapezoids after removing the initial formworks, using the set concrete as guides. Exhausting 15 hour days. Much thanks to Kevin and Corin for their amazing work!


Adding Windows

Time to keep the cold out! The plumbing is roughed in and we are working on getting the slab poured inside so some climate control is needed to cure the concrete. We will work the next few months on the interior until it warms up a bit and then knock out the hempcrete and exterior lime plaster.
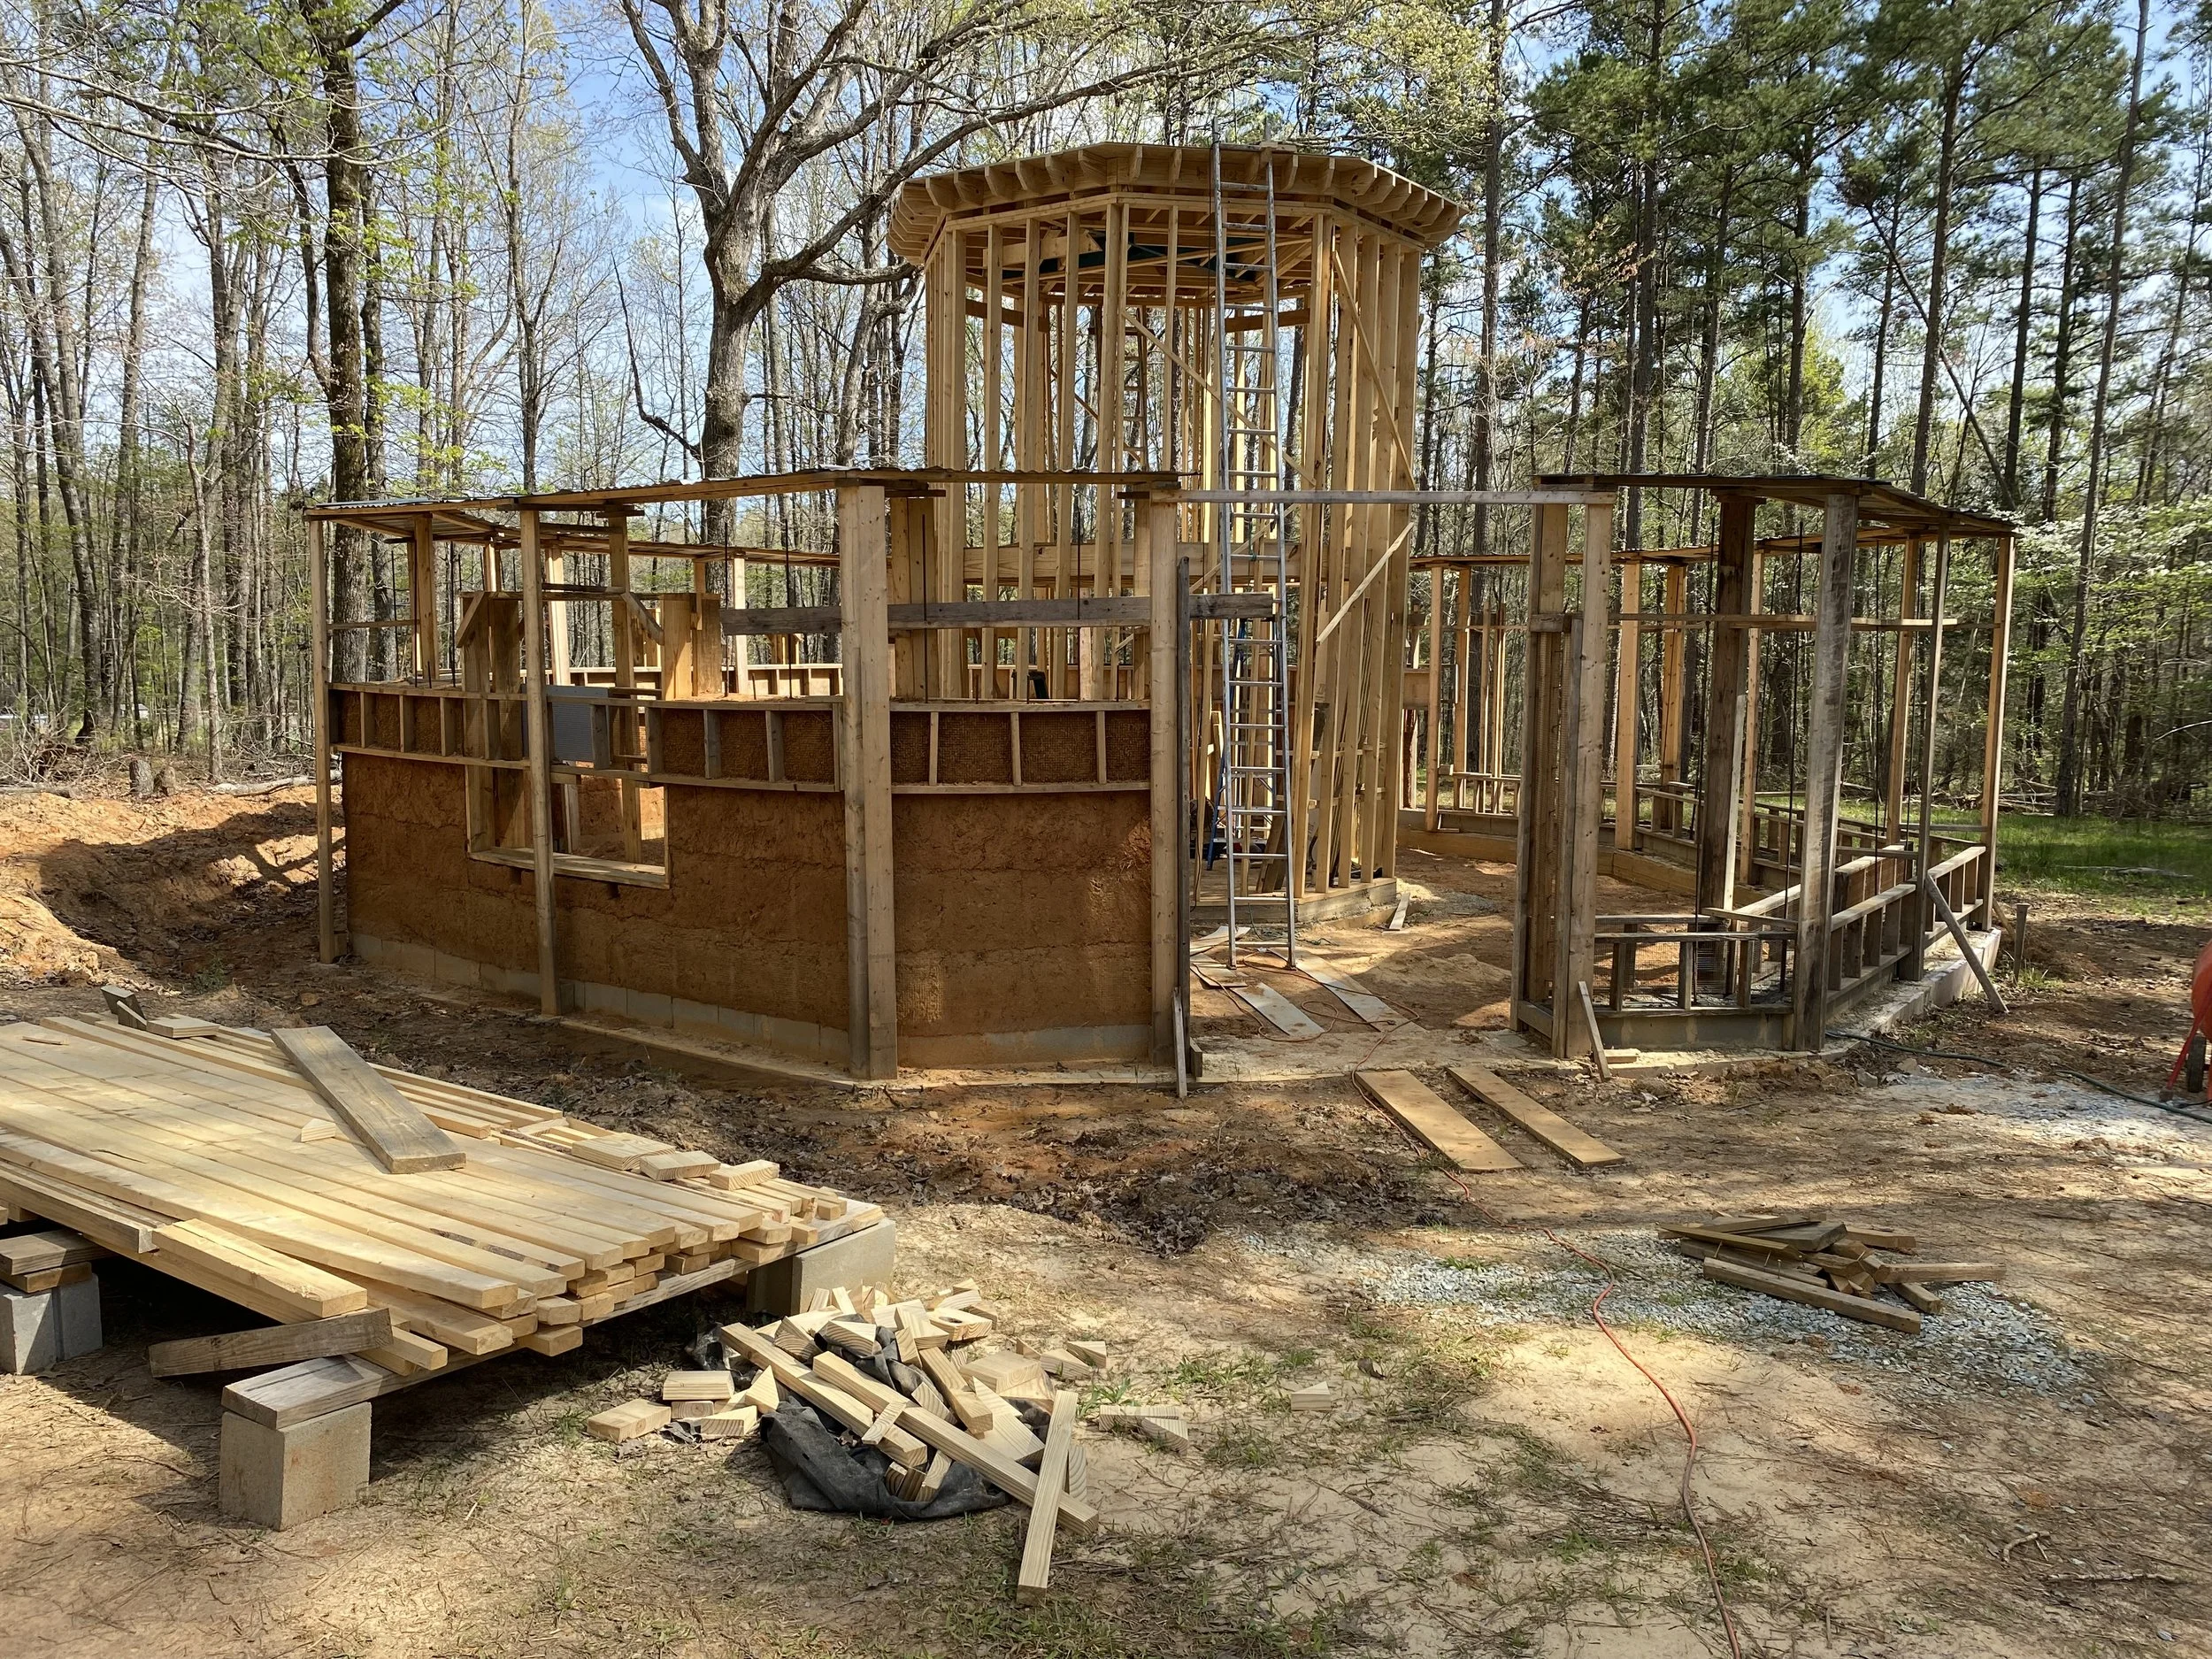
Framing Out the Roof
Great thing about an octagon - only 45s and 22.5s, already marked on your chop saw!


Earth USA 2022 Santa Fe, NM September 23-25
I will be giving a podium presentation titled Using Forming Systems, Mechanical Mixing and Placing, and Hempcrete Insulation to Modernize Cob Buildings at this year’s Earth USA conference in Santa Fe. I hope to see you there! I’ll be speaking first on Friday 9/23 at 10am.
Bond Beam and Cast-In-Place Header

The continuous concrete bond beam is finished. Earthen buildings do not resist lateral pressure well over the decades and centuries, but this concrete bond beam will take those lateral pressures and turn them into compression pressure, which is cob’s bailiwick. The bond beam will also help distribute any localized loads throughout a broader area and resist cracking in any sensitive areas such as lintel spans and corners.

Over the front door is a 7’ cast-in-place concrete header for the 6’ wide front door with two side lites. This is tied into the remainder of the bond beam that is constructed of specialized U-shaped CMU’s (concrete masonry units). J-bolts are spaced every 6’ to secure the treated 2” x 12” that will cap the wall. This will be some of the only treated wood we have had to use for this project, as the clay binder’s natural desiccating properties allow the use of untreated wood in contact with the cob even in our humid climate.
Capping the cob wall with a bond beam

We are transitioning from the cob masonry to the carpentry of the roof. It’s an exciting time as we wrap up the cob and hope to get a roof on in the next few weeks to dry everything in and lock in our hard work of the last year. This transition requires a specialized continuous section of concrete masonry units placed on top of the cob wall that will form a stable platform for the wood-framed roof to rest on. Earth walls tend to have poor lateral stability over the centuries, and a concrete bond beam will effectively take the structural lateral pressure off the cob and transfer it to where cob’s strengths are - it’s compressive load-bearing capacity. The U-shaped CMUs are reinforced with two layers of #4 rebar which are tied into the vertical rebar coming through the cob walls into the bottom of the bond beam, and then this assembly is filled with a continuous pour of concrete, with J bolts added to tie in the top plate and transition to the framing of the roof.

Boxbeams Above Windows and Doors
We are placing the internal lintel support over the windows and doors. This consists of two horizontal SYP 2” x 8”s with a vertical 2” x 12” T’d over each one. 6” spacers of 2” x 10” are then placed between the 2” x 12”s every 16” o.c. Each lintel will need to rest on the cob wall 6” on each side. They will then be filled with cob and the wall will continue up a few more inches before we put in the bond beam that will run continuously around the entire structure. The trick here is that the cob is still shrinking a bit, especially on the newer wall where the cob is not as dry. It’s important that the weight of the box beam be on the cob and not the window buck, or the loads will not distribute correctly and the corners of the cob wall will crack badly. So we have wedges over each vertical section of the window and door bucks to ensure that if the cob does settle below the level of the vertical framing member of the bucks, we can squeeze in more cob to ensure the lintels rest on the masonry of the monolithic adobe wall.

Near the Top!

We are at the last lift for the 2/3rds we started last year. Soon we will do the cast-in-place concrete lintels and then the bond beam, and, finally…the roof!
Using a Cement Mixer Attachment on a Skid Steer to Make Cob
Here’s a link to my Earthonaut video on Youtube on how to make cob in a cement mixer attachement.
Building the Center Octagon
Center octagon will hold the roof that will slope down in trapezoidal sections over the cob wall once it reaches height.
The last month has been busy, as we have been framing the center octagon, and just yesterday started back with cobbing. It took some effort to get the plumbing roughed-in and the center slab poured before we could begin.
Getting Cob to Meet the Energy Code
Getting Cob to Meet the Energy Code
As anyone who has lived in a cob home or tried to get a building permit for one knows, cob is a very poor insulator. At around R-0.2-.25/inch, even 16” thick cob walls only offer an R-value in the range of 3 or 4, well below energy code standards that require at least R-13 (or higher in colder climates). Some of this deficit can be made up using substitution, by adding extra insulation in the roof and/or flooring and/or traditionally framed exterior walls (if there are any). Many US county jurisdictions accept a Rescheck analysis rather than standard code requirements for meeting the energy code. This analysis can be done online for determining appropriate insulation substitutions. Inquire with your local code enforcement official prior to beginning to ensure your efforts will be acceptable.
An ideal combination for an external wall is one with high thermal mass on the interior and insulation on the exterior, and that is weather-resistant and with a tight building envelope. This is what Joel Lstiburek and the Building Science Corp have referred to as “The Perfect Wall”; i.e. from exterior to interior there is a rain control layer; an air control layer; a vapor control layer; and finally a thermal control layer. Achieving these aims with conventional construction will, unsurprisingly, add much additional cost/ft2 to the construction project. However, the same results can be achieved for much lower cost by utilizing a natural building combination of cob structural walls surrounded by hempcrete, finished with a lime plaster render on both sides, that will provide a tight building envelope with an extremely high decrement delay (Kappa).
Decrement delay is a poorly understood concept in the U.S. construction industry. It is the amount of time it takes for heat to pass through an external building element. It is dependent on both thermal mass and insulation. Wall systems with a combination of low thermal conductivity (high insulation), and high specific heat and high density (high thermal mass) will have a high decrement delay. Decrement delay acts a means of evening out temperatures inside the home to greatly reduce loads on building systems such as furnaces and air conditioners. Conventionally framed wall systems and most building code in the US does not take it into account.
I wouldn’t go trying to school your local building code official on decrement delay unless they seem open to it. Regardless, you’re going to have to meet the energy code that doesn’t (yet) take it into account. Your local building plans reviewer is going to want your exterior wall assemblies to meet a certain U-value criteria to give you a building permit. Hempcrete on the exterior of your cob walls can get you there. I was able to use the research conducted in the following two papers (at bottom) to convince my plans reviewer that hempcrete has a R-value of 2.1/inch. By adding 3.5” of hempcrete to the exterior of my cob, I was able to get to a roughly R-10 wall assembly value. By making up for this with some additional roof and floor insulation and decent windows, I produced a Rescheck energy code approval document that was acceptable to my plans reviewer here in North Carolina. This energy code approval is the second big hurdle to getting a cob building permit after getting the okay for using cob as a structural wall component, based on a structural engineer’s analysis (or possibly the new IRC cob codes) and results from compression tests on cob brick samples using your intended locally-sourced clay binder.
I hope these thoughts help you in your endeavors to get a cob building permit!
Hygrothermal Performance of Hempcrete for Ontario Buildings
Thermal Conductivity of Hemp Concretes
This paper is good for better understanding hempcrete in the context of high thermal mass building applications (decremental delay):
Sustainability of Solid Brick Walls with Retrofitted External Hemp-Lime Insulation
Cob Slipform Video
Recently uploaded a new video to the Earthonaut youtube channel for an update on the cobtagon project.
Thanks for watching! Please comment on youtube if you have questions or comments.
Making Cob with a Cement Mixer
Steps for making Cob with a cement mixer return.
It’s best to have the clay soak overnight a 5 gallon bucket. This will help soften the lumps of clay and get them to mix better with the sand. It’s also good to use a slightly damp sand to keep down any airborne dust that can be harmful to your health. I start preferably the day before by filling up as many 5 gallon buckets of clay as I think I will need the next day. If I run out, I try to soak the clay at least thirty minutes.
I fill the 5 gallon buckets up to the top with loose clay and then spray and water with the house until the clay is completely covered. When I am making the cob I start by adding nine shovel fulls of loose sand with the cement mixer running. I then add the 5 gallon bucket of wet clay. With very clumpy clay I may break the clumps by hand or with a drill with a steel mixing arm attached to a corded drill.
I let it mix for 2 to 3 minutes, occasionally spraying additional water from the house to the top left of the cement mixer to loosen any sand or clay that is stuck to the drum. The cement mixer should give you audible clues that it is nearing completion of the cob mix by rocking back-and-forth with the cob loafs thumping on the bottom. If it fails to achieve this you should add more water. The mix will be on the wet side, but this is good thing since the two ingredients (clay and sand) will mix better the wetter the mix. The key is to add dry straw at the end to soak up the additional water and give you the consistency that you need.

With the forms as you see in the background, we go up 18” levels at a time. Fewer levels will make for a more monolithic cob wall, as the area where cob layers upon the dryer layer will always be a weak point in the wall. Occasionally, after a few batches I take the shovel and scrape the inside of the mixer a few times to loosen the sticky stuff. I would say one person working with materials already ready, can do about one cubic yard of cob per eight-hour day. You will be quite tired at the end of a full day like this.
We are cobbing
The cob slipforms are working well. We are filling them all the way up to top and then advancing around the circumference at roughly a 45 degree angle, plopping and slopping cob as we go. We will see how far we get before winter sets in…

Vanessa and Jamel mixing and placing cob.

Here are the slipforms. The forms themselves are 18” tall and are holding the cob in place with 1/4” hardware cloth. After we make it around the perimeter, we’ll unscrew the wood forms and slide them up 18” and start the process over again. Using forms give nice straight walls and makes placement easier. For a 9’ wall we will do six layers. We can also mix and place cob with a small skid steer to speed up the process, but for now we are just using the cement mixer. The height of the rebar is 9’ and represents the end height of the masonry wall. Embedded in the last 8” will be a U-shaped cement block for the bond beam. The rebar will come up through the bottom of the U-shaped cement block and then be all tied together in a circle, and concrete will be poured. The rebar going through the cob wall from the footing to the bond beam will counteract wind uplift on the structure. Also poured in the bond beam will be anchor bolts for a top plate. The roof rafters will go from this top plate to the wood-framed two story center octagon.

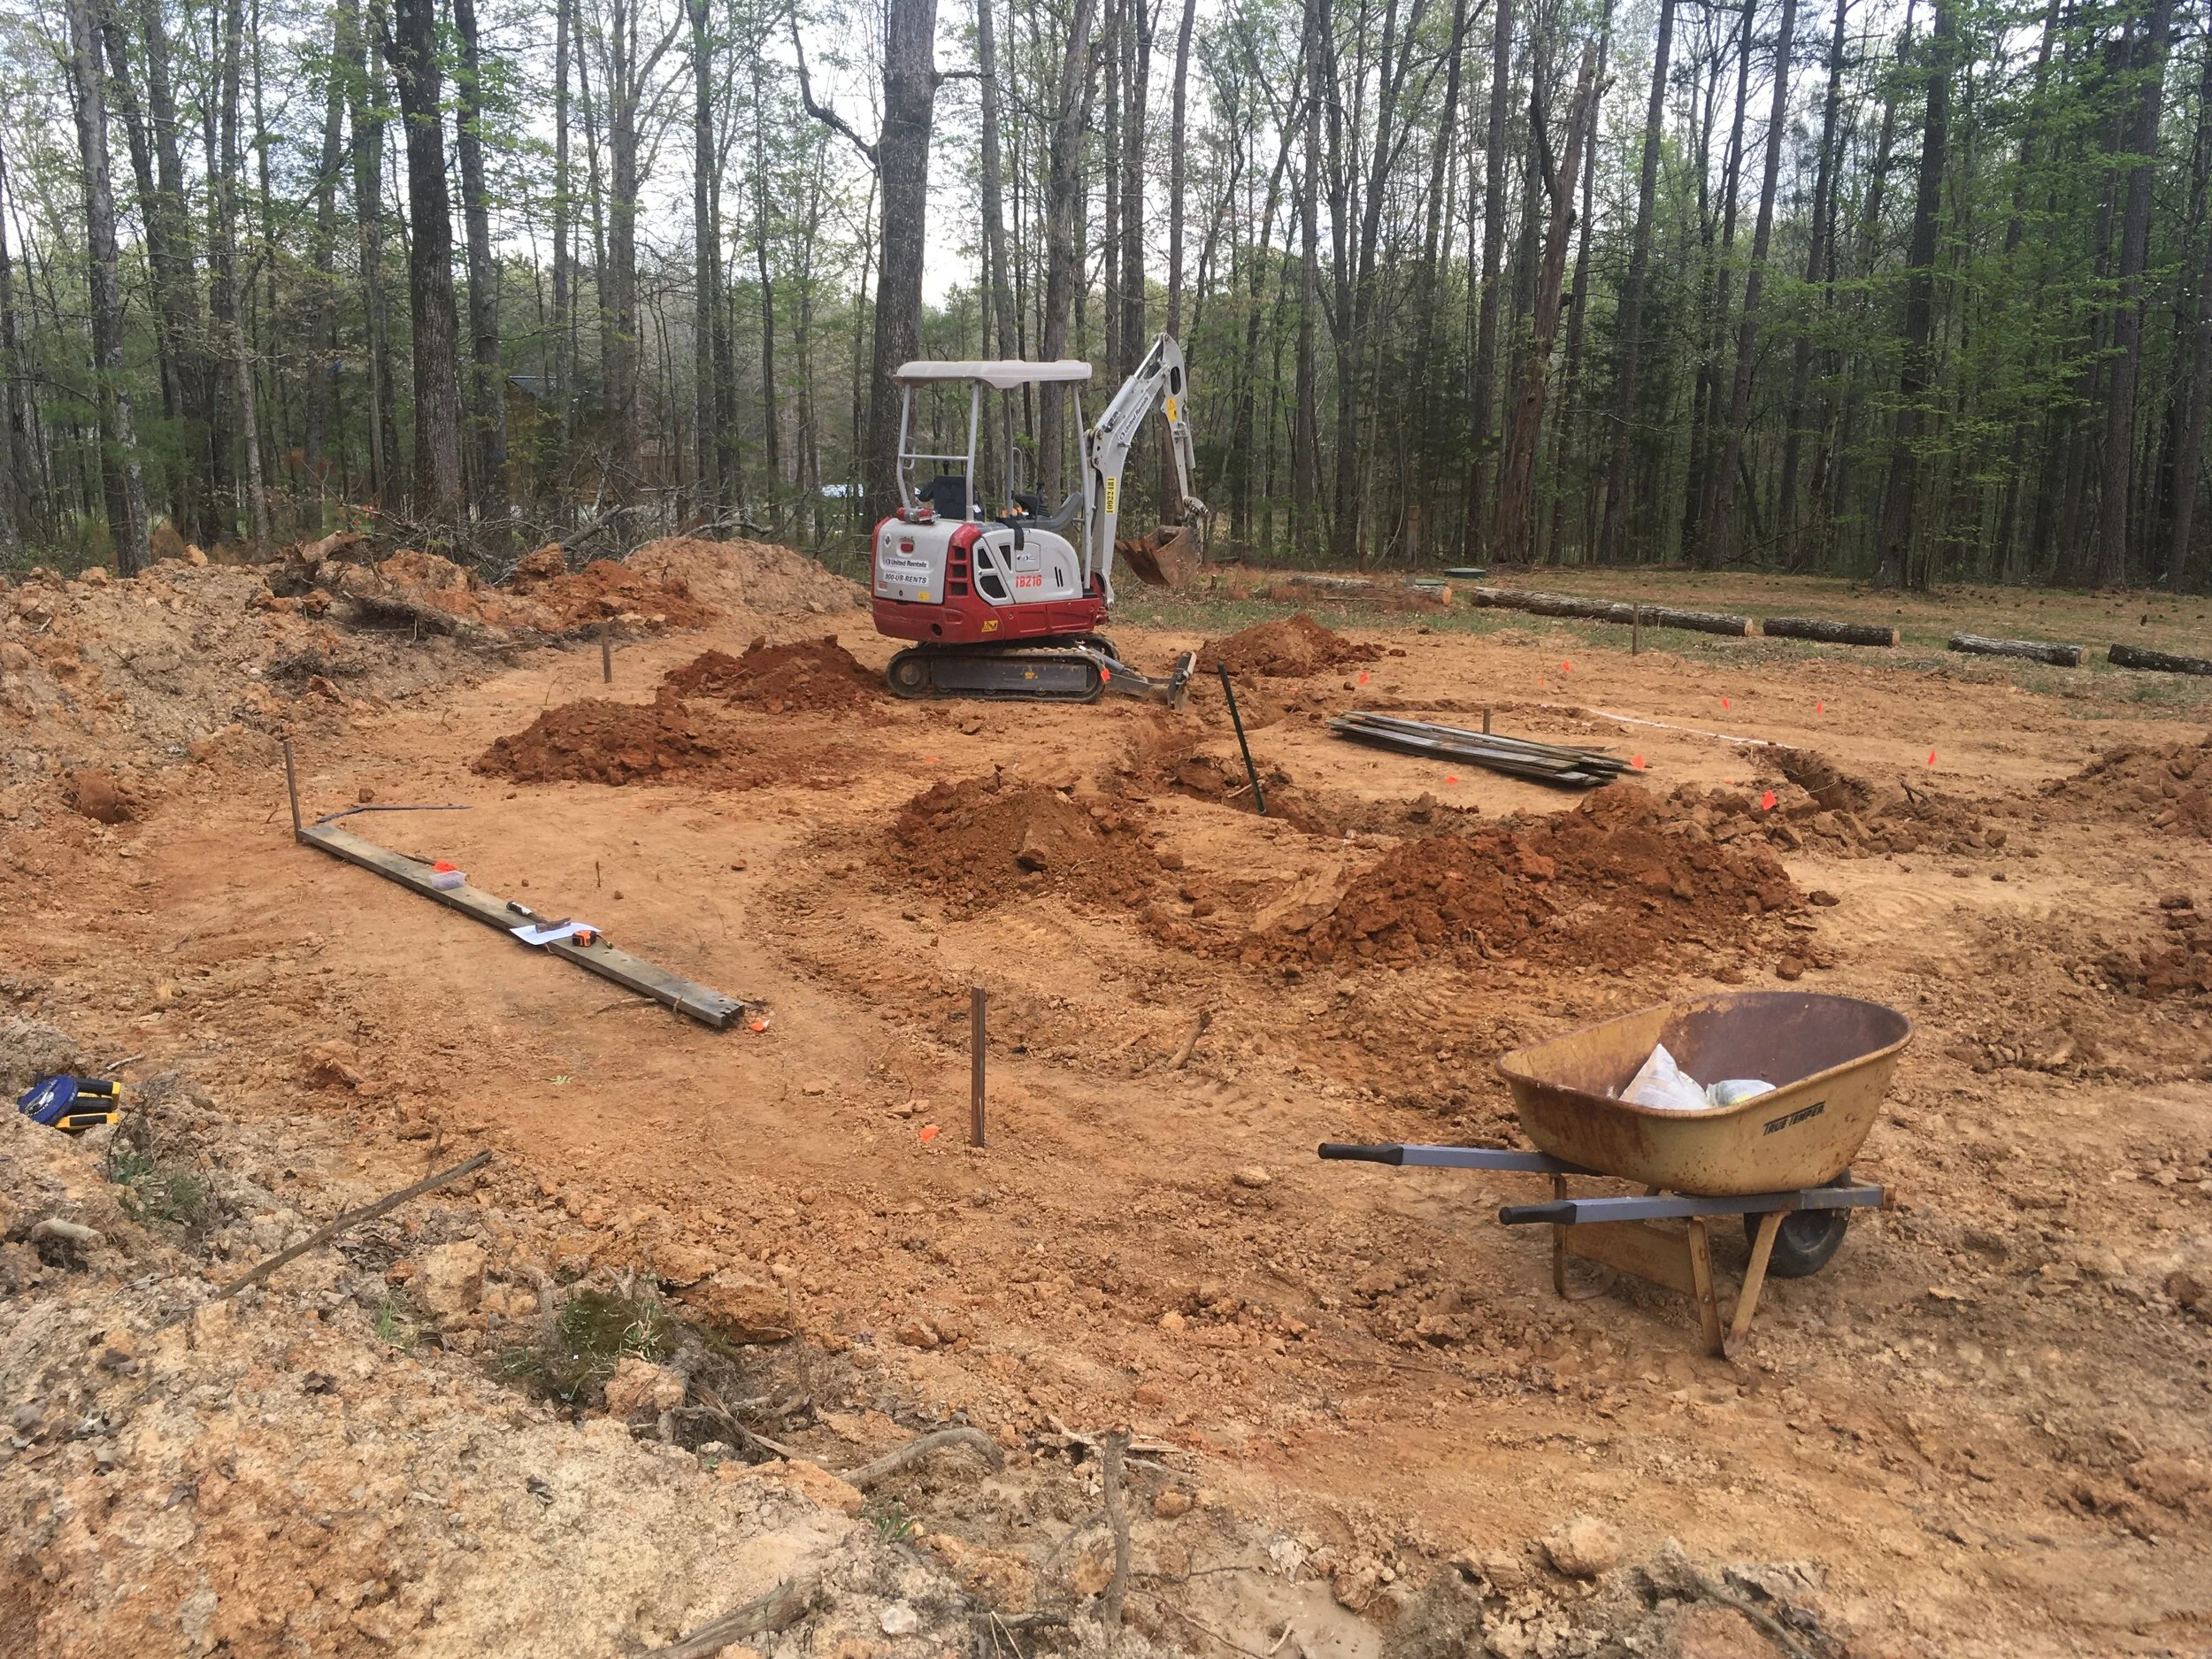
Concrete Footings/Cob slipforms
Well not the most satisfying part of the process, but certainly a major accomplishment - getting the footings dug and the concrete poured, whew, glad to be done with that! The stress of having the concrete trucks squirm around the perimeter of the cobtagon was intense. Thanks to Jamel, Iain and Kevin for helping out! Then, finally, we’re getting to the more interesting part of building the forms in anticipation of finally making cob. Stay tuned!

The footing is 30” wide: 16” for cob, 4” for hempcrete on exterior, 4” to catch the slab on the inside, 4” extra, and 2” for R10 foam insulation as a thermal break from grade.

A major triumph! The footings are poured. Always stressful to have the huge concrete trucks on site, but everyone was awesome - thank you!

The cob gets lifted off the ground with one layer of block, filled with gravel. The block will get mastic as a capillary break to keep it dry.
Digging the Footings
After a soggy late winter (and other distractions), we are finally able to begin work on the digging the footings. Look at all that beautiful red clay coming up out of the ground, pretty soon that’ll be cob! Makes me think of that Willie Nelson song “Hello Walls”… We need to get these footings dug out, the rebar laid out as per our building plans, our plumbing sleeves put in, and the county inspector to come and give us the thumbs up. Then we will be good to starting building all the way up to the roof. Looking forward to a summer of cobbing! Stay tuned, and be sure to get in touch if you want to come visit.
Cob Building Permit!
It took about half a year, but in September 2020 the cob octagon was finally approved by the Orange County Building Department for construction. The process was relatively straightforward if time-consuming, and basically entailed the following steps:
1) Working with an architect to produce the needed plans, including elevations from all four sides, foundation and cob wall cross-sections, framing details for interior load-bearing walls, roofing details, and electrical.
2) Consulting a structural engineer to determine, based on the plans, what the strength of the cob samples would need to be (it called for compressive strength of 100psi).
3) Finding another structural engineering firm that would do cob testing; determining how many they would need; making the samples and letting them dry sufficiently (takes a month +); then waiting impatiently for the results.
4) After the first batch came in too low, making multiple samples using different ratios of sand/clay and with a mix of binders - straw, hemp, and straw/hemp mix. I also switched methods of creating the samples. The original batch was made in 8” sections of 4” PVC pipe, but this took forever to dry. For the second batch, I switched to the 4” cubes called for in the IRC cob code made out of wood (2”x6”s ripped down to 4”), making batches of five each. The optimum mix turned out to be a 3:1 sand/clay mix with both wheat straw and hemp fibers (Group C below). Second best was hemp fiber alone (Group B). Third best was traditional straw (Group A). Interestingly, Group D was a batch that I put cement in with the idea that if I had to I could add cement. But it turns out that didn’t help. The concrete seemed to keep the samples moist and may have reduced the effectiveness of the clay binder.
5) Submitting the plans to the Orange County Plans Reviewer and making multiple changes to accommodate their concerns. A big problem was cob not meeting the Energy Code. So we agreed to wrap the exterior of the cob in 3.5” of hempcrete (nominal R-value 7.35 @ R-2.1/inch).
6) Sweating it as they reviewed the changes, which took almost two months.
7) Celebrating! Then stressing again because the hard work hadn’t even started yet…
